We finally finished our dolls last weekend!
After baking the hands and legs last week, we started blushing them to add more detail and make them look more realistic. We also blushed the face, paying more attention to the cheeks and mouth.
 |
| Making sure both legs are equal in size! |
 |
| Applying blush to the doll's face |
Then, it was time to put hair on the doll heads! Philip decided to do hair flocking as he wanted the doll hair to be short. I decided to do wigging as I wanted my doll to have longer hair.
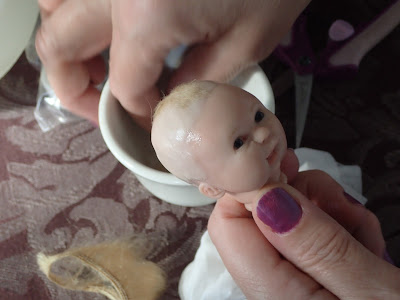 |
| Hair Flocking on the doll's head |
 |
| Philip and his doll's head, he is so happy |
 |
| My doll has got a messy hairstyle! |
 |
| Giving him a hair cut! |
After completing, we proceeded to attach our doll's arms, legs and head to the soft body which was stuffed with polyfibre and beads. We had to be careful not to tighten too much so that the grooves on the arms, legs and head do not break.
 |
| Philip's Doll |
 |
| Wayne's Doll |
 |
| Attaching the limbs |
We then put clothes on our dolls and voila, our dolls were complete! Philip and I were extremely pleased with our baby dolls. It is very interesting to note that although both of us followed Carmel's instructions, both dolls turned out rather differently. Philip's doll is more Caucasian looking while mine looks more Asian.
 |
| Wayne's Doll |
 |
| Philip's Doll |
Both of us thoroughly enjoyed ourselves and we are extremely grateful to Carmel for willing to share with us the art of polymer clay doll making. We hope you enjoyed reading the post and I will surely be making other polymer dolls in future. Stay tuned!
 |
| L-R: Wayne, Carmel and Philip |


No comments:
Post a Comment
Thank you for writing me a comment! Have a great day! =)