Showing posts with label Doll. Show all posts

Wednesday, May 2, 2018

Bundle Baby Workshop, 20 & 21 April 2018

Carmel, Nicole and Joanne

Wayneston Studios is pleased to collaborate with Art Doll Artist, Carmel Ooi to conduct a Bundle Baby Workshop in April. This workshop has welcomed 4 students, namely Hema, Esther, Joanne and Nicole.


Carmel shared with the students the type of clay and tools used to sculpt the doll. Each student was given a pre-baked head armature with eyes in the correct position before adding and baking clay in layers. Using this method the polymer clay requires multiple baking times so that each adjustment remains hard and fixed at the desired position before adding more detail to the face.


Once the eye muscles/structure was ready, the students later added cheeks, lower jaw and lips to their baby. Each baby has a different expression and they are truly One-of-a-Kind. After the head is done, Carmel showed the students how to make a soft body for the baby and gave each of them a hand-sewn blanket for the baby to sleep in.


Joanne and Nicole's babies

Hema and Esther's babies

Esther, Carmel and Hema

At the end of the class, we took several group photos. We would like to thank Carmel for her time and for sharing her valuable knowledge with us. We look forward to having her in Wayneston Studios again to conduct another doll making class.

Hugs,
Wayne
Friday, February 16, 2018

Experience the Art of Doll Making with Carmel Ooi


Wayneston Studios is pleased to collaborate with Art Doll Artist, Carmel Ooi to introduce doll making workshop. In the month of April, we will be learning how to make a 5 inch bundle baby from Prosculpt polymer clay specially imported from USA!

As demand for these workshops is expected to be high, places are limited and on first-come, first-served basis.
Sign up for her bundle baby workshop today!

Limited to 8 pax per session.
Register your interest now with Wayne at: waynestonbears@yahoo.com.sg

Cheers,
Wayneston Studios & Team

Monday, February 12, 2018

Bundle Baby Workshop by Carmel Ooi


Carmel Ooi with her creations

Wayneston Studios is pleased to collaborate with Art Doll Artist, Carmel Ooi to introduce doll making workshop.
In the month of April, we will be learning how to make a 5 inch bundle baby from Prosculpt polymer clay specially imported from USA! Don't miss this opportunity to learn from an experience teacher.
Limited to 8 pax per session.
Register your interest with Wayne at: waynestonbears@yahoo.com.sg

Tuesday, October 17, 2017

Meet Bobby the BJD Doll!

Could you still remember the last doll made by Wayne? It was probably done more than 2 years ago! 

This time Wayne took up a challenge to make a BJD (Ball Jointed Doll)!


Wayne signed up for a Simple SteamPunk BJD Contest hosted by Apryl Jenson, Owner of the Makingfairies.com

He decided to do this because this would give him the opportunity to learn something new; he had always wanted to make dolls and other creations besides just bears. The other challenge that he would had to overcome was his inability to create outfits and use a sewing machine. He hoped that by joining this competition, it would give him the opportunity to discover and learn new techniques.

The first face made by Wayne

With the help of Wayne's doll teacher, Carmel, Wayne learnt to created a more child-like face

Wayne discovered that doll making is more difficult than making Teddy Bears because there are basically no patterns to make a doll! All you need is to use your imagination to mold and sculpt a doll by using balls of clay. Thankfully, there is a printed size and proportion of the doll so that you can always keep track and make sure your doll is not oversized!


The dolls made are definitely OOAK (One of a Kind) since they are hand sculpted. That is unless you cast and make multiples of them from molds.

It's very frustrating when the joints kept breaking.

Wayne learns to make a wig cap for Bobby!
Wayne felt that the most difficult process of making a BJD was to prevent the breakage of the joints on the limbs. He would need more experience through trial and error to find a better way to strengthen the joints. That is why most of the BJD in the market are made of resin as resin is hard and strong.

First attempt to give doll a make-up with oil paints
Wayne also felt that he needs more practise to learn how to paint a doll's face. It is very difficult to paint symmetrical eye brows and lashes. 

After the doll was completed, Wayne measured and drew an outfit pattern and sew it using a sewing machine. It took Wayne two tries to get the right fitting for the doll to wear. Looking at Bobby's completed outfit made all the effort worthwhile!

Sewing pants for Bobby

A failed attempt!

Bobby finally has his pants and shoes on.

Wayne is very proud of Bobby! Wayne has submitted Bobby for the competition and we hope we can win some blocks of clay to make more dolls!


We want to take this opportunity to thank Apryl for organising this event and we hope to join the event again next time.


Hugs, Wayne

Wednesday, July 8, 2015

The Art of Polymer Doll Making - Part Two

We finally finished our dolls last weekend!

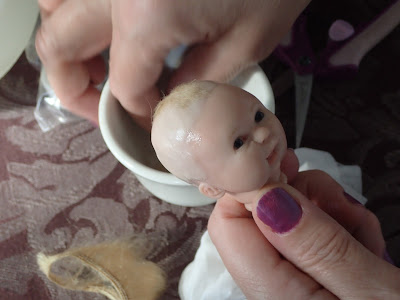
After baking the hands and legs last week, we started blushing them to add more detail and make them look more realistic. We also blushed the face, paying more attention to the cheeks and mouth.


Making sure both legs are equal in size!

Applying blush to the doll's face

Then, it was time to put hair on the doll heads! Philip decided to do hair flocking as he wanted the doll hair to be short. I decided to do wigging as I wanted my doll to have longer hair.

Hair Flocking on the doll's head


Philip and his doll's head, he is so happy

My doll has got a messy hairstyle!

Giving him a hair cut!

After completing, we proceeded to attach our doll's arms, legs and head to the soft body which was stuffed with polyfibre and beads. We had to be careful not to tighten too much so that the grooves on the arms, legs and head do not break.

Philip's Doll

Wayne's Doll

Attaching the limbs

We then put clothes on our dolls and voila, our dolls were complete! Philip and I were extremely pleased with our baby dolls. It is very interesting to note that although both of us followed Carmel's instructions, both dolls turned out rather differently. Philip's doll is more Caucasian looking while mine looks more Asian.

Wayne's Doll

Philip's Doll


Both of us thoroughly enjoyed ourselves and we are extremely grateful to Carmel for willing to share with us the art of polymer clay doll making. We hope you enjoyed reading the post and I will surely be making other polymer dolls in future. Stay tuned!

L-R: Wayne, Carmel and Philip


Friday, June 26, 2015

The Art of Polymer Doll Making - Part One

Over the weekend, Philip and I attended our very first polymer clay doll workshop taught by Doll Artist, Ms Carmel Ooi.


Carmel is an experienced Doll Artist who has been making dolls for more than 5 years. We are indeed very thankful to have the opportunity to learn something new and interesting.

A year ago, Philip and I learnt to make Porcelain Dolls from Ms Paula Loh. It is a totally whole new experience this time as the medium which we used is Polymer Clay. There are no moulds and we have to sculpt the doll from scratch!


Before we started working on the dolls, we used a lint roller to remove specks of dirt, dust and fine fibres that were on our body. Following that, we washed our hands and dried our hands with a microfibre cloth. Carmel explained that it is imperative to work in a dust free environment so that we can keep the dolls surface as clean as possible. 

Carmel then went through with us the different type of sculpting tools and clay used. It is also important  to research and understand body proportions before starting so that the doll does not look weird.


First off, we started with the face. We took some aluminium foil and compressed it into an egg shape. During this process, we have to make sure to squeeze out all the air in the aluminium foil or air bubbles may surface on the clay later after baking.


After that, we took a portion of the polymer clay and kneaded it before putting onto the egg shaped aluminium foil. Then, we added multiple layers of clay progressively and baked them to increase the thickness and depth of the face. We inserted glass eyes and added details to the cheeks and mouth areas. We discovered that polymer clay can usually be baked numerous times without colour changes to the clay.


Interestingly, we learned that the nose is always the last part to be added onto the face. Carmel than showed us how to create a smiley face on our dolls by referring to images online.


We also learned to use armatures for the arms and legs. Carmel showed us 2 different methods of sculpting the hands and legs and let us decide which method we prefer to use. After finishing the hands, we added some details onto the front and back of the hand before baking them. Following that, we added more clay to the armature to mould the arms and added some details on the inner and outer parts of the elbows to make the arms look more realistic. After finishing, we baked the arms! We also did the same for the legs.


We are glad to have completed the face, hands and legs last weekend and this coming weekend we will be working on the body.

More pictures will be shared soon, stay tuned here to read more on our doll making adventures!

Hugs, Wayne